
Quests
Below are descriptions of quests available in Diablo and its expanson Hellfire. Some of the quests appear in the game at random, i.e. we can encounter one quest in a gameplay and then have another quest in its place on the next playthrough.
QUESTS IN DIABLO
Dungeons
(2 out of 3 randomly chosen)
The Butcher

Quest Giver: Kael Rills
Dungeon Level: 2
Description:
We meet a man which is about to die by the gate to the Church, who will besotw of this quest. Wounded Townsman will ask us to revenge his soon to come death and kill the Butcher, who lives in a room filled with dismembered bodies of people, who blindly trusted Archbishop Lazarazur but got driven into a trap.
Reward
- Single Player: The Butcher's Cleaver (unique axe)
- Multi Player: Random magic item
Additionl info:
This quest can appear in Single player and multi player mode, however, in multi player the quest will always be take place.
Gharbad the Weak

Quest Giver: Gharbad the Weak
Dungeon Level: 4
Description:
On the 4th dungeon level in the Church’s underground we will meet Gharbad, who will plead not to kill him and we will make a magic item for us instead. Upon coming back to him after a while he will say the item is still not ready. After coming back again, Gharbad states we do not deserve the item. We will have to fight Gharbad after this. Quest will be completed after killing Gharbad.
Reward
- Two random magic items
Additionl info:
Only available in Single Player.
Ogden's Sign


Quest Giver: Ogden
Dungeon Level: 4
Description:
Ogden will ask us to help finding tis tavern sign that got stolen by small demonic monsters. One of the Dark Ones, Snotspill, will ask us the same, threating to attack us with his friends if we don’t bring the sign to him. To get to the sign we need to defeat few Suzerens and then we can bring the sign to Ogden who will give us cap „Harlequin Crest”. If we decide to give the sign to Snotspill – he will attack us saying he now wields great power.
Reward
- Harlequin Crest (unique helm)
- Magic item from Snotspill)
Additionl info:
Only available in Single Player.
Dungeons
(1 out of 2 chosen randomly)
Poisoned Water Supply

Quest Giver: Pepin
Dungeon Level: 2
Mini Dungeon Level: Poisoned Water Supply (Dark Passage)
Description:
At some point it water in the town will get poisoned. Pepin will ask us to find the source of Tristrams well and find out what is the reason for it being poisoned. On dungen level 2 Dark Passage will appear that leads to underground water supply source desecreated by monsters. After killing all monsters the water will be cleansed.
Reward
- Ring of Truth (Unique Ring)
Additionl info:
Only available in Single Player.
The Curse of King Leoric
Quest Giver: Ogden
Dungeon Level: 3
Mini Dungeon Level: Skeleton King's Lair (King Leoric's Tomb)
Description:
Ogden will tell us about King Leoric and his gradual desent into madness after kidnapping of this son - Prince Albrecht. The King accused everyone for this son dissapearance and has hold gruesome executions. When royal prists and knights were trying to calm him down, the King has turned on them and they had to kill him. However, giving his last breath away Leoric casted a terrible curse on his former supportes and swore they will serve him in the darkness – forever. Now, the ex-King has woken up from his eternal slumber and commands an army of undead. Our mission will consist of finding Leoric’s Tomb which is located on dungeon level 3 of the Cathedral and killing King Leoric. After killing the king, don’t forget to cut loose four crucified skeletons. This will open a secret room for us with chests with magic items.
Reward
- Single Player: The Undead Crown (unique helm), magic items in chests in secret rooms.
- Multi Player: magic item from Skeleton King,
Additionl info:
This quest will always take play in multi player mode.
In the single player mode, the King of Skeletons can resurrect skeletons. In Multiplayer mode he has ability to drain health on every hit.
In single player King Leoric is located in special mini dungeon level, to which entry is localted on dungeon level 3 in the Cathedral. In the multiplayer, Leoric does not have a mini dungeon, but is local on dungeon level 3 instead.
Catacombs
(2 out of 3 randomly chosen)
The Magic Rock

Quest Giver: Griswold
Dungeon Level: 5
Description:
Griswold will tell you about a caravan, which was apparently meant to deliver a stone that fell from heavens, but has been ambushed by masked raiders and was robbed. The quest is to find the stone which is localted on a stand placed on dungeon level 5. We need to return the stone to Griswold to get the reward.
Reward
- Empyrean Band (unique ring)
Additionl info:
Only available in Single Player.
Valor


Quest Giver: Book of Blood
Dungeon Level: 5
Description:
There is a room somewhere on the 5th dungeon level , where we find one of the Blood Stones. We need to place it on the stand nearby. This will open a small room on to the left. The next stone is in there, after placing it on another stand a room will open to the right, and the last stone will be in there. After placing the 3rd stone on a stand central room will be opened that has chest with the reward. During this mission you will fight a few Horned Deamons – moderatly difficult enemies for this dungeon level.
Reward
- Arkaine's Valor (unique armor)
Additionl info:
Only available in Single Player.
Halls of the Blind

Quest Giver: Book of the Blind
Dungeon Level: 7
Description:
After reading the Book of the Blind on dungeon level 7 we will be granted access to Halls of the Blind in which suffering souls of the damned are bound. One of the halls will have Optic Amulet in it.
Reward
- Optic Amulet (unique amulet).
Additionl info:
Only available in Single Player.
Catacombs/Caves
(2 out of 3 randomly chosen)
Zhar the Mad
Quest Giver: Zhar the Mad
Dungeon Level: 8
Description:
Somewhere on the 8th dungeon level in Catacombs we will met a mage, Zhar the Mad. After talking to him, he will give us magic tome and order us to leaev. If we talk to him the second time or take a book gtom his library, he will get mad and will attach us. After killing him the quest is complete.
Reward
- Two magical books, one magic item.
Additionl info:
Only available in Single Player.
Black Mushroom


Quest Giver: Adria
Dungeon Level: 9
Description:
Somewhere on dungeon level 9 we will find a book lying on the floor – The Fungal Tome. Bring the book to Adria and he will ask you to find Black mashroom local on the same dungen level 9. After fetching it, Adria will tell you Pepin is looking for Demon’s brain. The brain will drop from the first monster killed on the same dungeon level , bring it to Pepin. In return he will give you an elixir which then you have to bring to Adria. She tell you to keep the sample. Now you can drink this magic elixir – it gives +3 to all attributes.


Reward
- Spectral Elixir
Additionl info:
Only available in Single Player.
Anvil of Fury

Quest Giver: Griswold
Dungeon Level: 10
Description:
Griswold asks us to find the anvil of fury which contains the essence and power of the demon world. The anvil can be found on 10th dungeon level in the very middle of a small isle surrounded by lava from 3 sides. After defeating monsters gurading the anvil, we take it straight to Griswold who wil give us his own sword as a reward.
Reward
- Griswold's Edge (unique sword)
Additionl info:
Only available in Single Player.
Hell
(1 out of 2 randomly chosen)
Warlord of Blood
Quest Giver: Steel Tome
Dungeon Level: 13
Description:
On dungeon level 13 you will find Steel Tome. We will read about Armories of hell filled with bodies of humans and angel, which is headquarters to Warlord of Blood. Kill the Warlood of Blood and the armory will be yours.
Reward
4 magic weapons, 2 magic armor, 1 magic item from Warlord of Blood.
Additionl info:
Only available in Single Player.
Lachdanan

Quest Giver: Lachdanan
Dungeon Level: 14
Description:
On dungeon level 14 we will meet Lachdanan, captain of King Leoris knights who will tell you about the curse that rests on him and his knights. He will ask you to find Golden Elixir which can free his soul from the curse incumbent upon his soul. Elixir can be found on 15th dungeon level – you need to take it to Lachdanan and to show his gratitude will give us his magic helm – Veil of Steel.
Reward
Veil of Steel (unique helm).
Additionl info:
Only available in Single Player.
QUESTS ALWAYS PRESENT
(All of these quests are present in every game)
The Chamber of Bone

Quest Giver: Mythical Book
Dungeon Level: 6
Description:
After reading Mythical book, walls surrounding the Chamber of Bones will disspear. Upon entering the chamber we need to kill all monsters in there and turn two levers to open doors to smaller room full of treasure, and we will also need to read Ancient Tome to complete the quest.
Reward
6 magic items from chests, increased level of guardian spell +1
Additionl info:
Only available in Single Player.
Archbishop Lazarus
Quest Giver: Deckard Cain
Dungeon Level: 15
Mini Dungeon Level: Archbishop Lazarus' Lair
Description:
On 15th dungeon level we will find Staff of Lazarus and bring it to Cain. He will ask us to kill Lazaras and find the missing Prince Albrecht. After returning to Hell, a red portal will appear next to the huge pentagram. We need to go into it and wil be teleported to Archbishop Lazaras’ Lair. Defeat single enemies, read two Books of Vileness, that will teleport us to hidden chambers, and return to the small area from which we entered the lair. This will teleport us into room with 3 bosses – Archbishop Lazarus, Red Vex and BlackJade and also lost of hell spawns. Our quest is to kill Lazarus.

Reward
3 magic items from bosses.
Additionl info:
In multi player, we will not find the Staff of Lazarus, but he can be found somewhere on 15th dungeon level istead.
Diablo
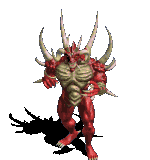
Quest Giver: Deckard Cain
Dungeon Level: 16
Description:
After killing Lazarus, Cain will tell us the only thing that’s left is to kill Diablo – The Dark Lord, the demon responsible for all evil. On 16th dungeon level you will find 4 large chamgers, 3 of them will have levers opening the next chamber. The 3rd room will have two levers that open the room with Diablo. The quest will be complete upon killing Diablo./p>
Reward
- Single Player: finishing the game.
- Multi Player: finishing one of the three difficulty levels.
Additionl info:
This quest is present in both singe and multiple player modes – it looks the same in both instances.
QUESTS IN HELLFIRE
Farmer's Orchard


Quest Giver: Lester the Farmer
Location: Nest
Description:
This quest is given to us by Lester the Farmer (you need to be at least level 15 for this quest to appear). You will be given Rune Bomb. You will need to get to where river forks (near where you start the game). Now, standing on the bridge you will need to cast the bomb into alien bulb on the ground. After the bomb blows up the entrance to the Hive will be open. Return to Lester to get Auric Amulet.
The Defiler

Quest Giver: The quest will activate after entering the Hive
Location: Hive
Description:
This quest activates right after entering the Hive. It consist of killing the boss The Defiler which is located on the 4th dungeon level of the hive. After killing him you will get Cathedral Map which you need to take to Gillian, who in return will give you another quest.
Grave Matters

Quest Giver: Gillian
Location: Crypt
Description:
This quest activates if you have the Cathedral map with you and talk to Gillian. You need to go to the cemetery which is local next to the Cathedral and drop the map on the huge grace – entrance to the Crypt will now be open.
Cornerstone of the World
Quest Giver: none
Location: Crypta
Description:
Cornerstone of the World is local in a small room on the first dungeon level of the Crypt. Drop any item on it to hear an interesting tale. Laying an item on the stone will make it available for any of your other characters. Remember, to do this trick, none of the characters taking part in the exchange of item cannot be present in the crypt. I recommend saving the game in the town every time you are trying to transfer and item using the stone.
The quest will never appear in your quest log.
Torn Notes


Quest Giver: none
Location: Crypt
Description:
On each of the first three dungeon levels of the Crypt you will find three pieces of notes. After getting all three they will combine to create Reconstructed Note. Now you need to place it on the Cornerstone of the World which will tell you how to open Na-Krul’s room.
Information about the order in which the read the tomes in front of Na-Krul’s chamber.
This quest never appears in your quest log
NA-KRUL
Quest Giver: Journal
Location: Crypt
Description:
Na-Krul is local in a small room localted on the 4th dungeon level of the Crypt. After killing him he will drop a Book of Apocalypse, a magic great sword, a magic war staff and a magic long war or battle bow. When you open his room by pulling levers, you will find you that he is a very strong opponent (for everyone except the monk who blocks majority of his hits). However, if you read the books in the adjacent rooms, the monster will be greatly weakened. The correct order is: 1. In Spiritu Sanctum 2. PreadictumOtium 3. EfficioObitusInimicus. If you want to hear special dialog, use command.txt file (a part of the cowquest activates it) and Na-Krul will start talking like a radio DJ.
Quests activated through Command.txt
Additionl info you can find in Command.txt section.
The Jersey's Jersey


Quest Giver: Complete Nut
Location: Nest
Description:
This quest can be activated only by using command.txt file and replaces Farmer’s Orchard quest. You will find Complete Nut instead of Lester the Farmer. After talking to him a couple of time he will give you the Rune Bomb. Drop the bomb on strange alien bulb next to the bridge. In the Hive you will give Gray Suit located somewhere on the 3rd dungeon level and brown suit somewhere on the 4th dungeon level. Bring Brown suit to the Nut and you will be given Bovine Plate.
Little Girl


Quest Giver: Celia
Location: Nest
Description:
This quest can only be activated using command.txt file. A little girl will appear next to tree near Adria. She will only appear if you have been inside the Nest. After killing the Hork Demon on dungeon level 3 in the Nest (a moze Hive?), he will drop Theodore the teddy bear. Bring it back to the little girls and she will give you a random magic amulet as a reward.